Transaction Screen
The Transaction Screen is used where one document has many lines — sales, purchases and the like. Each document has one header (party, series, number, date) and any number of item rows below it.
The sample screens here are from Sale. The same layout is used for:
- Purchase
- Purchase Return
- Sale Return
- Credit Notes and Debit Notes
- Consumption
- Transfer
- Expiry Inward, Expiry from Stock and Expiry Outward
- and some others
Each document type adds or hides fields to suit itself. The modes, the regions and the keyboard shortcuts below are the same everywhere.
Modes
The screen is always in one of three modes. The background colour changes with the mode, and a Sale Return uses its own colours to stand apart from a Sale. The sale-specific colour indicators are in Entry Time Information.
Display Mode
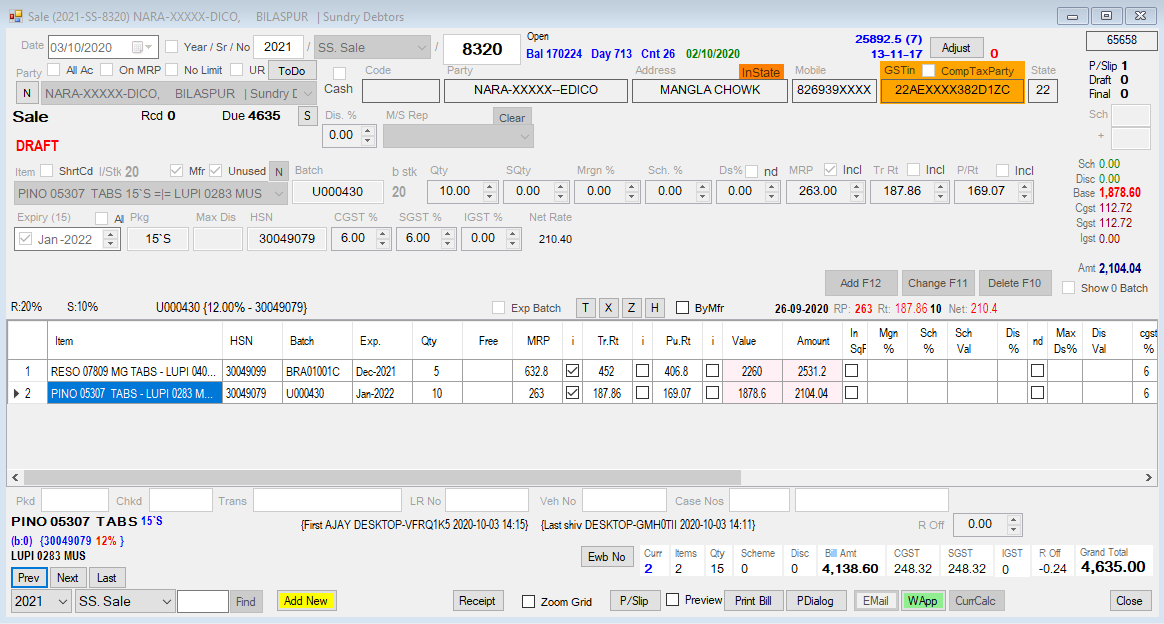
The screen opens in Display Mode. Documents can be viewed but not changed.
First,Prev,NextandLastmove through the documents.- To go to a particular document, pick the document series, type the number and press
Find. Addstarts a new document. A document series must be selected beforeAddis enabled.Editchanges the displayed document.- The output buttons —
P/Dialog,Print,EMail,WAppand, where set up,P/Slip— work only in this mode, and only on a complete document that is not locked.
New Entry Mode
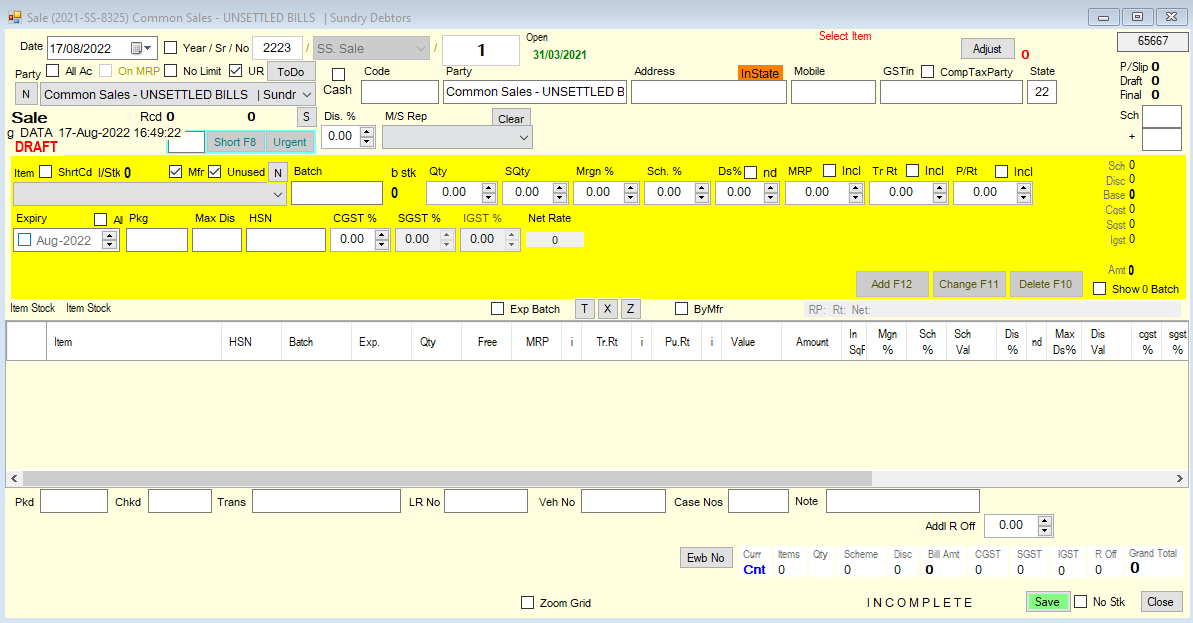
Choose the party, check the date and series, then add item rows. Save stores the document and returns to Display Mode.
Edit Mode
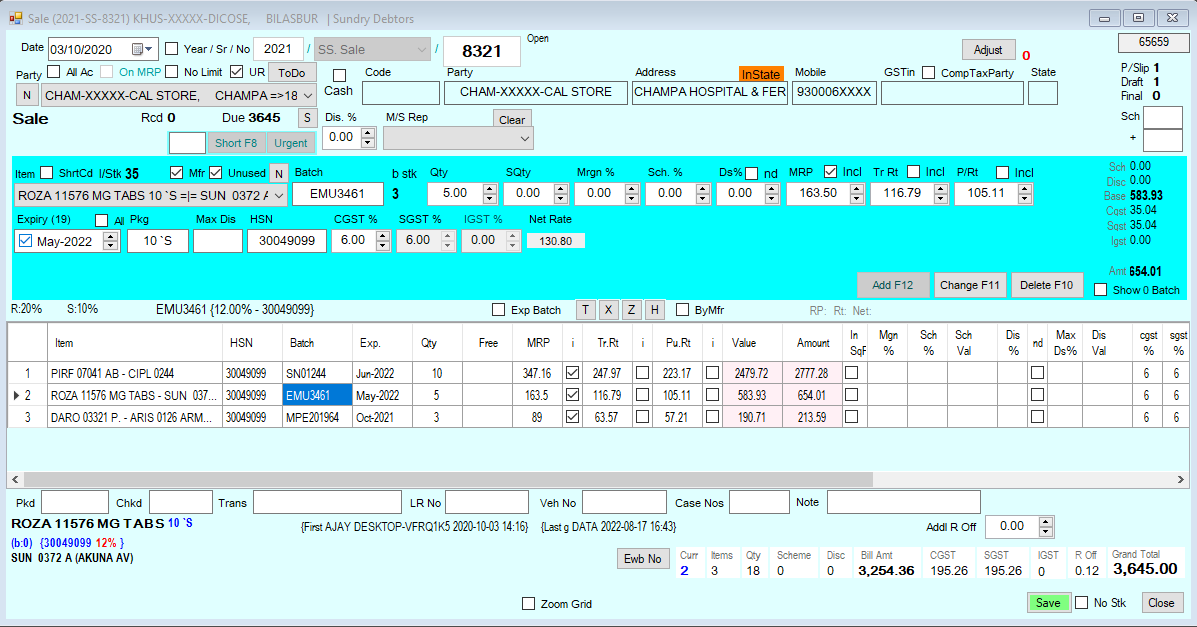
Whether a document can be edited depends on your permissions and on checks made on the document itself, such as locked dates and party limits. See Permissions and Locks.
While a document is being added or edited it is locked for all other users. If a lock is left behind, for example after a power failure, an administrator can release it with Force. See Force Open.
Regions of Screen
Information Parts
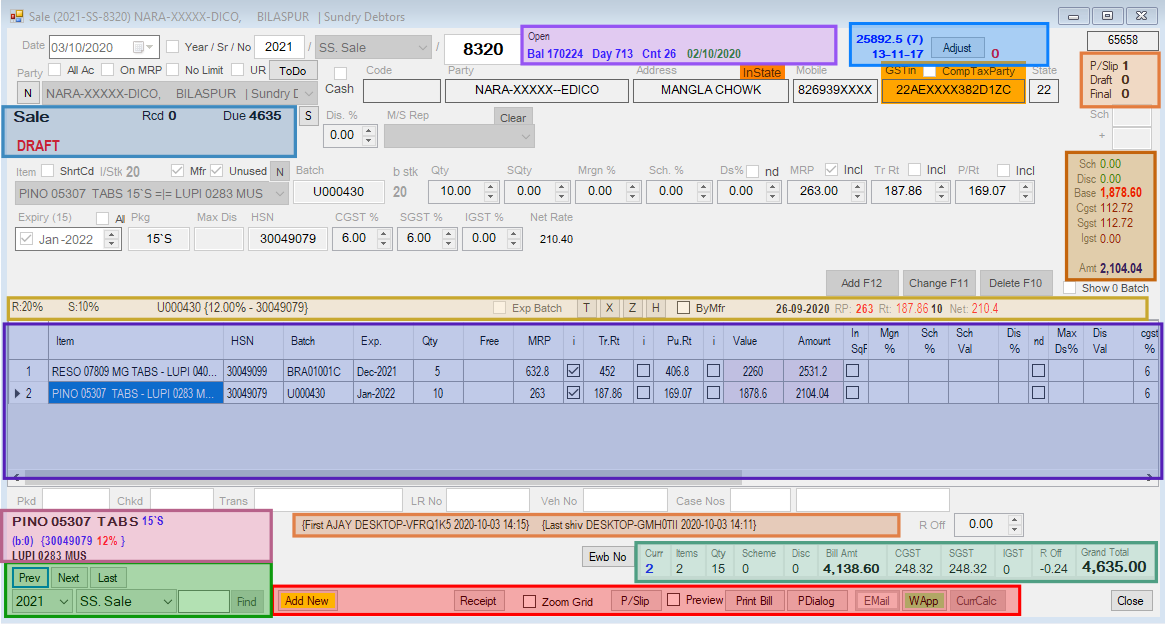
These show the document header — party, series, number and date — together with the running totals. They also warn you about problems with the party or the document, such as a credit limit, a licence or a tax mismatch. See Entry Time Information for what each panel and colour means.
Entry Parts
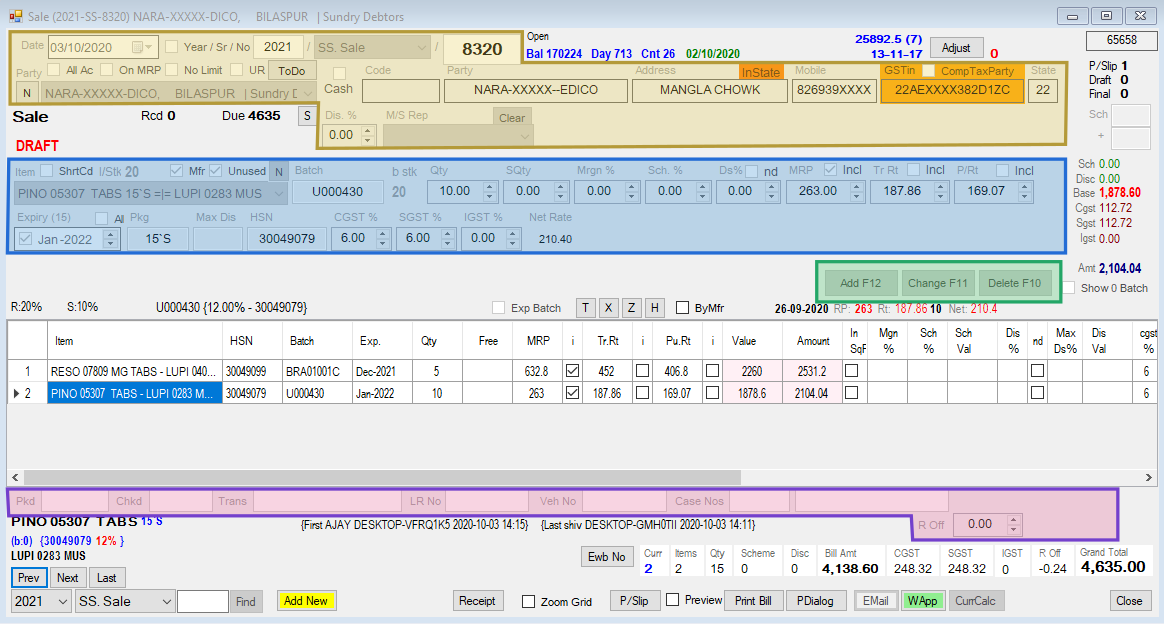
This is where you build one item row at a time:
- Select the item. Typing narrows the list, and the item's stock, batches and last rates appear as you go.
- Fill in batch, quantity, rate and discount.
- Press
Add(F12) to put the row in the document.
To correct a row, select it in the grid, change the entry parts and press Change (F11). To remove a row, select it and press Delete (F10).
Item Grid
The grid lists the rows of the document. Click a row to bring it back to the entry parts for changing or deleting. Typing while the grid has focus jumps to the matching item, and the Item column heading shows what you have typed so far.
Optional Buttons
Depending on the document and on what your firm has set up, extra buttons sit around the screen. They cover party and item history, short items, adjustments, ship-to, the e-invoice (IRN) and e-way bill, and a to-do for the document. They are described with the document that uses them, for example the Sales Form and e-Invoice.
Keyboard Shortcuts
| Key | Action |
|---|---|
F1 | On the item list, opens an item search. In the quantity and scheme fields, jumps to the scheme (SQ / SF) fields. |
F2 | Switches the item list between name order and short-code order. Where an item-number box is shown, jumps to it instead. |
F8 | Marks the selected item short for this party. See Short Items. |
F9 | Saves the document. In Display Mode, opens the print dialog (P/Dialog). |
F10 | Deletes the selected item row. |
F11 | Changes the selected item row. |
F12 | Adds the current item row to the document. |
The keys act only when the matching button is enabled. If F9 does nothing, look at the Save button and the message beside it to see why. Individual screens may add their own keys.