Report Screen
Every report in dsGST — ledgers, outstanding, summaries, lists — uses the same screen. Choose the filters, press Generate, then read, drill into or print the result.
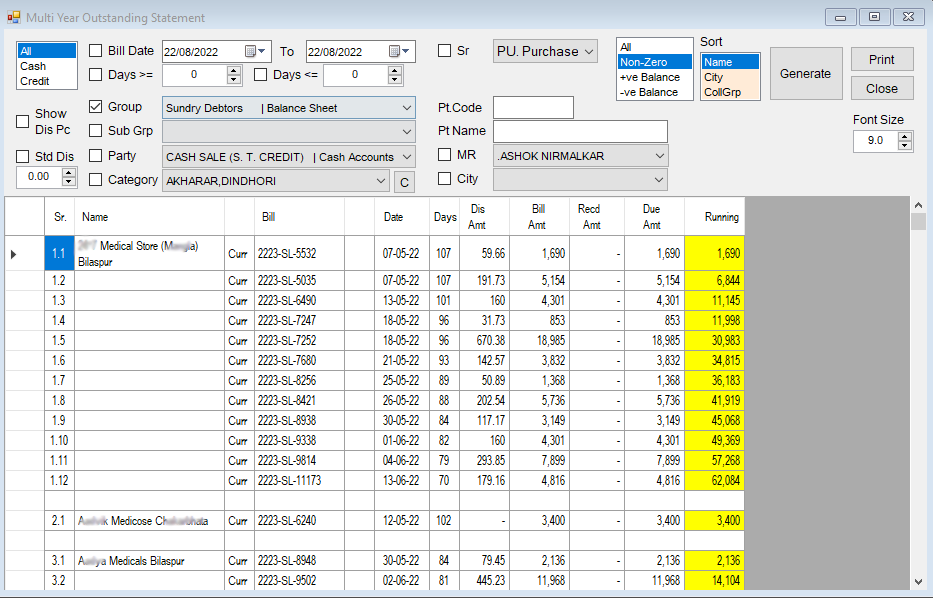
A report screen has three parts:
- Filter Area
- Report Area
- One or more Action Areas
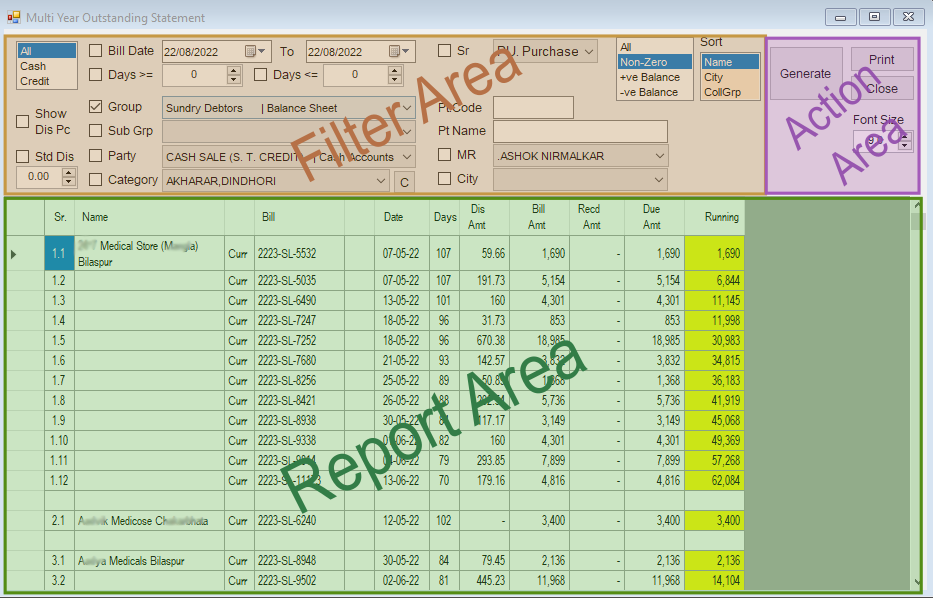
Filter Area
The Filter Area is where you choose what the report includes. Typical filters are:
- Date range
- Account Group
- Collection Group
- Particular text
- Document series and number range
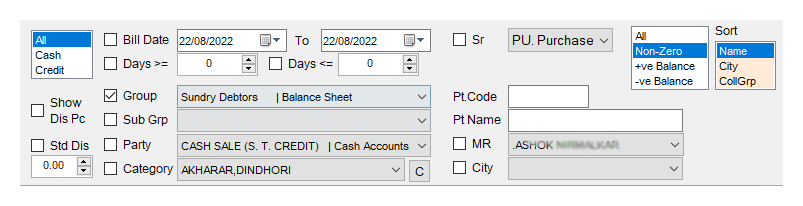
Tick the checkbox next to a condition and enter or select its value. Unticked conditions are ignored, so a report with nothing ticked covers everything. Press Generate again after any change.
The criteria you picked are written into the report's title lines, and the same lines are printed at the top of the page. A printed report therefore always says what it covers.
For text filters, * works as a wildcard. For example, *medical finds every name that ends in "medical".
Linked Account Filters
On account-based reports — Ledger, Account Summary, Outstanding (including FIFO and Multi Year Summary), Interest Calculation, FIFO Crossing, Account List, Party Limits and Sales Performance — the party filters are linked. Tick Account Group, Collection Group, Sub Group, RM Group or City, and the other drop-downs, including the party list itself, offer only values that match. For example, tick a City and the Collection Group list shows only the groups that have parties in that city.
Report Area
The report area is a grid of rows and columns.
- Column widths are print widths. The report prints as it appears on screen, with the same formats, colours and column widths. Drag a column border to resize it, and the next print or export uses the new width.
- Double-click a row to open the record behind it, such as a bill, an account ledger or an item. Reports that only summarise (a stock statement, for example) have nothing to open.
- Some reports can be edited or acted on in place. Examples are locking a ledger entry or deleting an unused item straight from the list. These reports have their own buttons for it.
- Select rows and tick Only Selected Rows in the Print Dialog to print just those rows.
Action Area
The Action Area holds the buttons. Generate, Print and Close are on almost every report screen.
| Button | Description |
|---|---|
Generate | Builds the report using the filters you chose. |
Abort | Stops a report that is taking too long. It is active only while a report is being built. |
Print | Opens the Print Dialog to preview, print, e-mail or export the report. |
Close | Closes the report screen. |
While a report is being built, Print is disabled and a progress indicator runs at the bottom of the main window.
Some report screens have more than one action area.
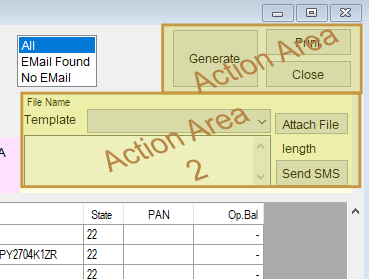
Some let you send a report straight to a party by e-mail or WhatsApp, without using the Print Dialog. Others let you make data entries from the report.
Tips
- Change the filters and press
Generateagain. A report is a snapshot, so it does not update until you generate it again. - Keep the report open and the Print Dialog open next to it. After you regenerate, the dialog's title and criteria refresh and you can print again without reopening it.